
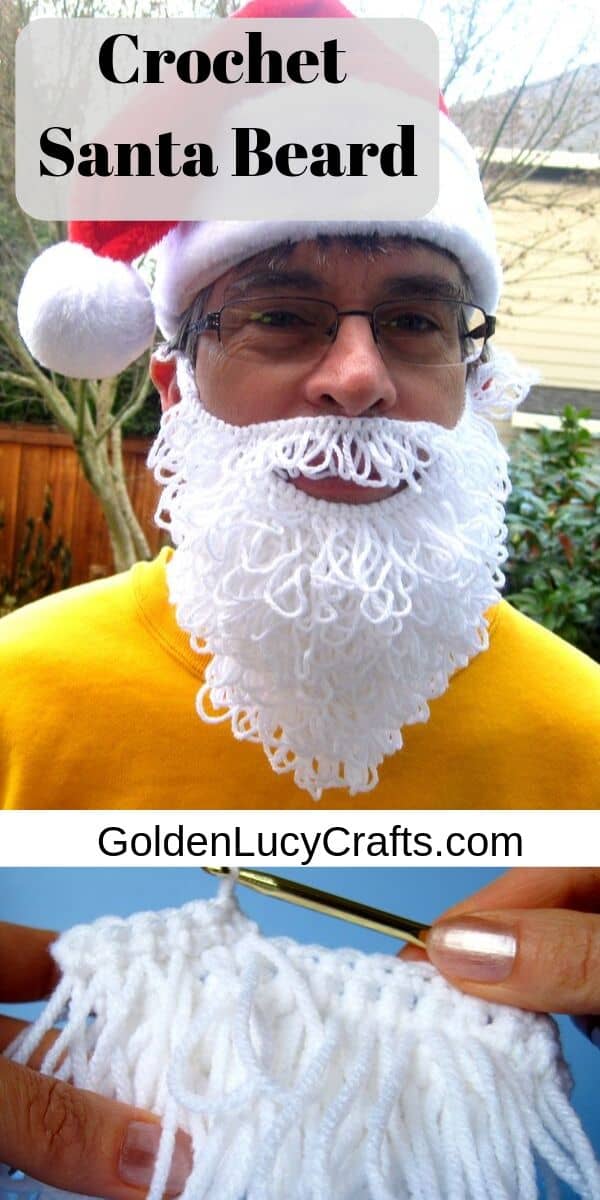
I made this beard last year for my husband, who was dressed up as Santa for Christmas. This crochet Santa Beard is very easy to make, I finished it in one evening!
Disclosure: This post may contain affiliate links, which means if you make a purchase from one of these links I will get a commission.
For this project, I used a Loop Stitch technique. If you are not familiar with Loop Stitch, below you will find detailed instruction with plenty of photos.
I hope you will have fun making this crochet Santa Beard!
Crochet Santa Beard – Free Crochet Pattern
The pattern for this Crochet Santa Beard is also available as a print-friendly, styled and advertisement-free PDF in my Etsy shop.
Add this pattern to your Ravelry library!
PIN this pattern to your Pinterest Board for later!
You can find my favorite crochet supplies HERE!
Size:
This adult size Santa’s beard is about 8” long. You may also adapt the pattern to a smaller version by using thinner yarn, smaller size hook and working less rows.
Note:
Make sure that you don’t crochet too tight as your crochet fabric will have a tendency to roll up in the corner.
Abbreviations:
Ch – chain
Loop St – loop stitch
SC – single crochet
Sl St – slip stitch
St (Sts) – stitch (stitches)
Instructions:
How to make a Loop Stitch
Loop Stitch is usually worked on wrong-side rows because the loops form at the back of your work. Loop Stitch is a variation of single crochet.
1. Insert your hook into the next stitch, just as you would for single crochet. Using the index finger of your left hand, pull up the yarn to form a loop of the desired size.
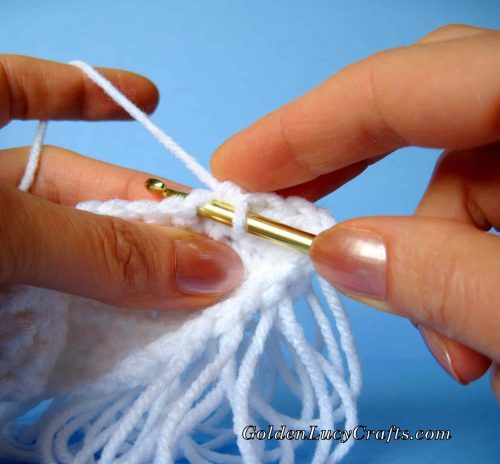
- Bring the hook behind the loop in such way so two strands of the loop would be in front of the hook.
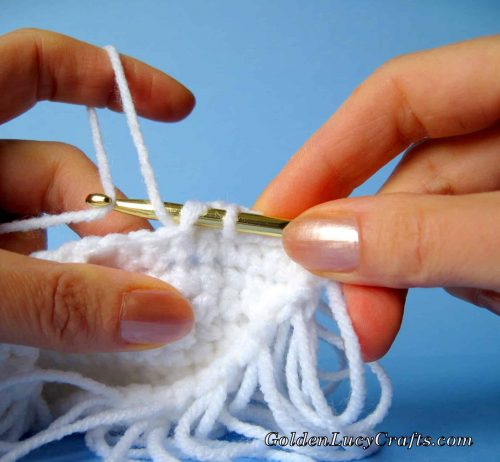
- Pick up both strands of the loop and draw them through. You have to make sure that you are picking up both strands, otherwise, your Loop Stitch will not be made correctly. You will have 3 loops on your hook.
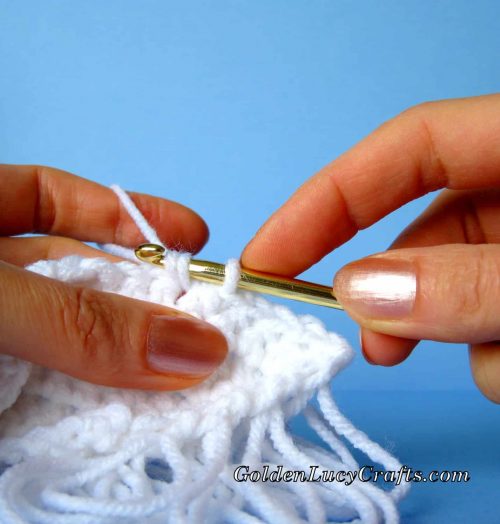
- Wrap the yarn over your hook and draw the yarn through all 3 loops.
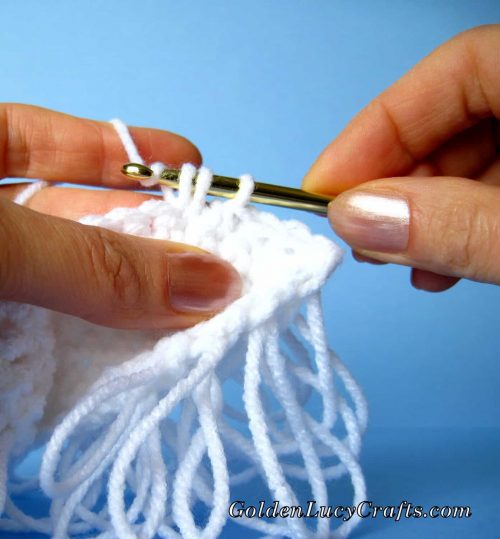
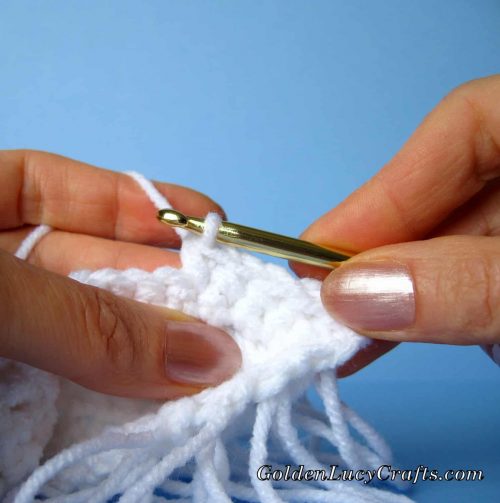
Your Loop Stitch will be on the back.
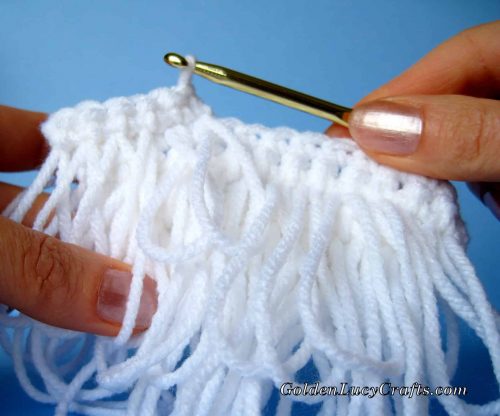
Watch video tutorial for the Loop Stitch on my YouTube channel HERE.
Beard
Ch 9;
Row 1. SC in 2nd Ch from the hook and in each of next 7 Chs (total 8 Sts). Ch 1 and turn.
Row 2. 2SC in last St of previous Row, SC in each of next 6 Sts, 2SC in next (last) St (total 10 Sts). Ch 1 and turn.
Row 3. Loop St in each St of previous Row. Ch 1 and turn.
Row 4. 2SC in last St of previous Row, SC in each of next 8 Sts, 2SC in next (last) St (total 12 Sts). Ch 1 and turn.
Row 5. Loop St in each St of previous Row. Ch 1 and turn.
Row 6. 2SC in last St of previous Row, SC in each of next 10 Sts, 2SC in next (last) St (total 14 Sts). Ch 1 and turn.
Row 7. Loop St in each St of previous Row. Ch 1 and turn.
Row 8. 2SC in last St of previous Row, SC in each of next 12 Sts, 2SC in next (last) St (total 16 Sts). Ch 1 and turn.
Row 9. Loop St in each St of previous Row. Ch 1 and turn.
Row 10. 2SC in last St of previous Row, SC in each of next 14 Sts, 2SC in next (last) St (total 18 Sts). Ch 1 and turn.
Row 11. Loop St in each St of previous Row. Ch 1 and turn.
Row 12. 2SC in last St of previous Row, SC in each of next 16 Sts, 2SC in next (last) St (total 20 Sts). Ch 1 and turn.
Row 13. Loop St in each St of previous Row. Ch 1 and turn.
Row 14. 2SC in last St of previous Row, SC in each of next 18 Sts, 2SC in next (last) St (total 22 Sts). Ch 1 and turn.
Row 15. Loop St in each St of previous Row. Ch 1 and turn.
Row 16. 2SC in last St of previous Row, SC in each of next 20 Sts, 2SC in next (last) St (total 24 Sts). Ch 1 and turn.
Row 17. Loop St in each St of previous Row. Ch 1 and turn.
Row 18. 2SC in last St of previous Row, SC in each of next 22 Sts, 2SC in next (last) St (total 26 Sts). Ch 1 and turn.
Row 19. Loop St in each St of previous Row. Ch 1 and turn.
Row 20. 2SC in last St of previous Row, SC in each of next 24 Sts, 2SC in next (last) St (total 28 Sts). Ch 1 and turn.
Row 21. Loop St in each St of previous Row. Ch 1 and turn.
Row 22. 2SC in last St of previous Row, SC in each of next 26 Sts, 2SC in next (last) St (total 30 Sts). Ch 1 and turn.
Row 23. Loop St in each St of previous Row.
Ch 10 for the side; turn.
Row 24. SC in 2nd Ch from the hook and in each of next 9 Chs, SC in each of next 7 Sts, Ch 17 for the mustache, SC in last 7 Sts of previous Row, Ch 10 for another side, turn.
Row 25. Loop St in 2nd Ch from hook and in each St to the end of the Row. Do not cut off the yarn.
Ch 45 for the tie, cut off the yarn leaving about 2” tail and pull through the last Ch to secure. You don’t need to weave in the end.
For the second tie – join the yarn to the beginning of last Row, Ch 45, cut off the yarn leaving about 2” tail and pull through last Ch to secure. Tie the beard above the ears on the back of the head and it will hold well on the face!
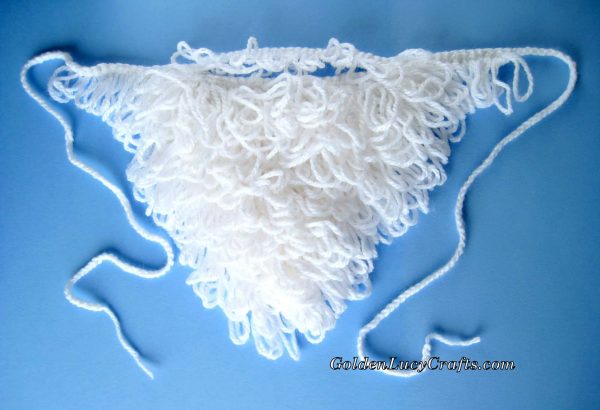
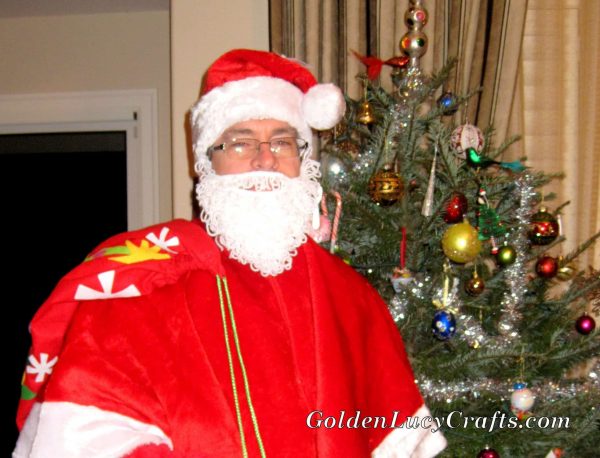
I hope you enjoyed this Santa Beard Free Crochet Pattern!
For more crochet patterns, craft ideas and fun projects follow GoldenLucyCrafts on Facebook, Pinterest, Twitter, and Instagram!
You may also like:
Crochet Santa Ornament
Crochet Themed Christmas Ornament
Crochet Reindeer Applique
Your step by step instructions with photos are so helpful! I also love how this turned out. I’m going to make this a home project with the kids. Thanks for sharing!
You are very welcome! I am glad that you like my Santa beard!
Thanks! Saved the day when my son couldn’t find a bead at the store the night before a project was due. Great directions and works up so quickly!
*beard
I am very happy to hear that you like this pattern!
Thanks for this cute and funny beard pattern. I’ve been crocheting an elf theme for my grandkids who are all pretty grown. They won’t let me stop so this will be their elf beard this year.
I had trouble with the loop stitch but finally got it whew! Very clever!! Gramma of 8
I am happy to hear that you like this pattern! Thank you!
Hello, going to give the beard a try for my Hubby. Can you tell me how much of the super saver yarn is required please? Thanks for sharing the pattern. Nan S Wales UK 🙂
You will need about 50 g.