
This beautiful crocheted cord (or crocheted ribbon), also known as the Romanian cord, is a very popular element in Romanian and Irish laces. Also, it is widely used in freeform crochet.
You can use this crochet cord in many different ways. You can make an elegant belt, embellish any of your handmade projects, make drawstrings, or you can use it in jewelry. I used this crochet cord for my crochet necklace.
Disclosure: This post contains affiliate links, which means if you make a purchase from one of these links I will get a commission. As an Amazon Associate I earn from qualifying purchases.
I used crochet thread size 3 for my sample. You are welcome to use different thread sizes or yarn weights depending on the purpose of your cord.
Crochet Romanian Cord Photo Tutorial
You can PIN this tutorial to your Pinterest boards HERE or PIN the image below.

Abbreviations:
(See a list of crochet abbreviations used in patterns by yarn industry designers and publishers HERE)
Ch – chain
St (Sts) – stitch (stitches)
YO – yarn over
Materials:
For my sample I used Aunt Lydia’s crochet cotton thread size 3 and crochet hook E-4 3.5 mm.
Find my favorite craft and crochet supplies HERE!
Instructions:
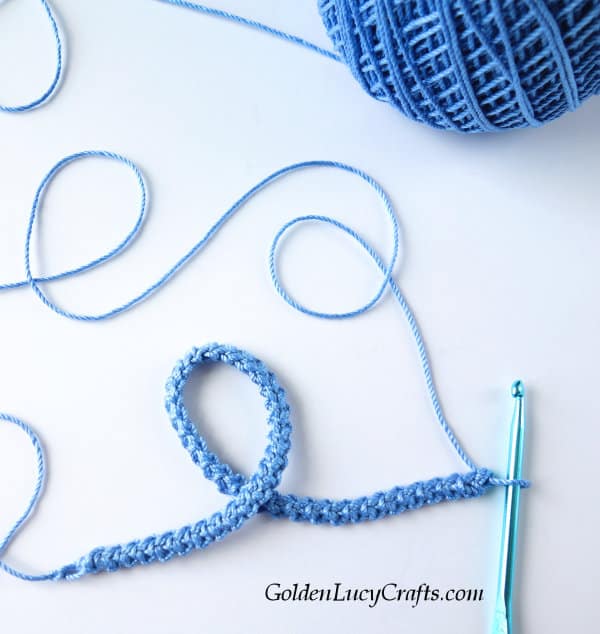
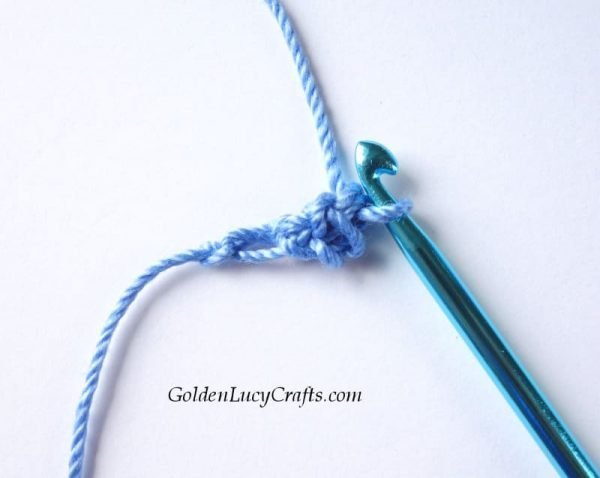
Ch 3,
1. Insert hook into 2nd and 3rd Ch from the hook, YO and draw a loop – you have two loops on the hook.

2. YO and draw yarn through those 2 loops.

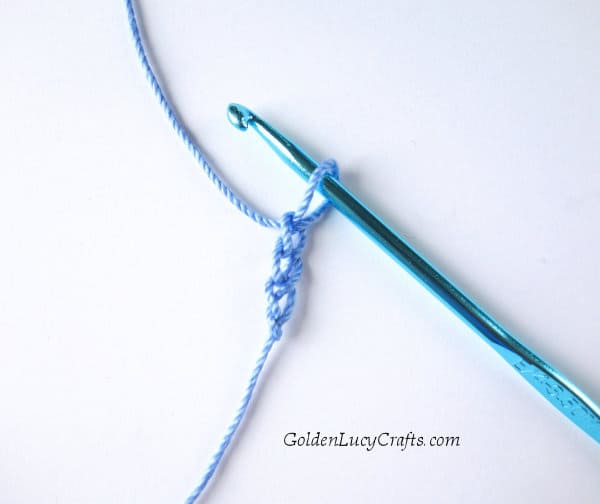
3. *Turn work away from you, insert hook under 2 strands highlighted in red.
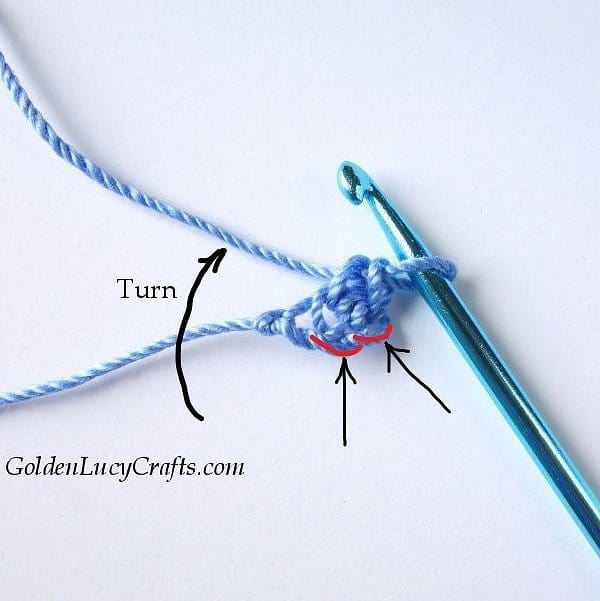
4. YO, draw a loop through those 2 strands – you have two loops on the hook.
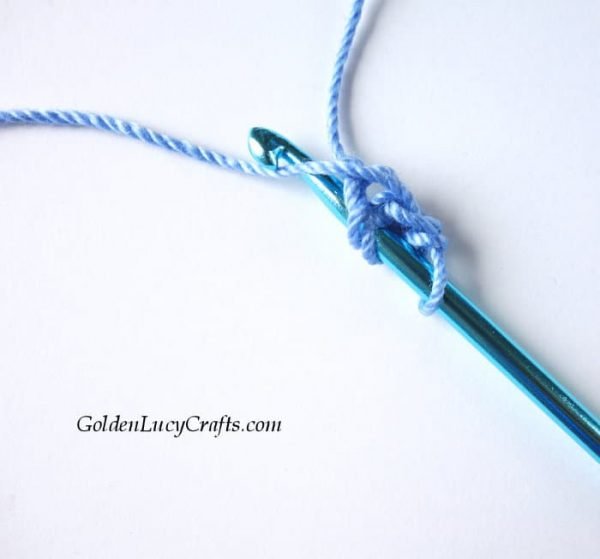

5. YO and draw loop through 2 loops on the hook.
6. Continue repeating from * – turn and work under two strands.

How to Crochet Romanian Cord Video Tutorial

I hope you enjoyed this crochet Romanian cord photo and video tutorial!

Happy Crocheting!

What yarn did u use???
On the pictures: Aunt Lydia’s Crochet Thread, Size 3, color – Warm Blue
Do you have a pdf or word document of this pattern please. It’s beautiful. Thank you for sharing. ?
There is no “Print Friendly” button
This button was removed as it caused technical problems.
I can’t figure out step 3 and the rest. It is not close enough to see. Also not slow enough. Beautiful pattern and I love it. I tried to enlarge it on my phone, it won’t allow that. Any way to see it better?
Thank you.
I am sorry that the pictures are not large enough for you. Have you tried to use a computer? It has a larger screen. Also, I highlighted with red color strands where you need to draw a yarn in steps 3 and 6. I hope this will help. About video – have you tried to pause it? You can always pause the video whenever you need it.
This cord can be a little bit tricky at the beginning. But when you figure out how to make it – it is easy. Years ago, when I first tried to make it, it took me a couple of attempts to figured it out.
Thank you. I have been trying to figure a way to make a waist-band tie for a child sweater. This will be a big improvement from my improvised version. Thanks for sharing!
What happened to instruction line 5. I see instruction line 4 then it jumps to instruction #6.
Thank you for noticing that! I just fixed it.
Been trying to work this out for ages and your tutorial has made it clear for me! Thanks!
Hi. Thank you for this. Really beautiful. No matter what I try I can’t get to the video. I am on a pc and don’t normally have problems like this. Can you help, please. Thanks
The video is at the end of the post after writtern instructions. I just checked and it is working fine for me. I am soory, but I don’t know why it is not working for you.
What are the buttons for
I used buttons as props in the photo to add more interest to the picture.